The
VistaPrint card design tool, like many desk top publishing utilities, has a
facility for converting uploaded images into background watermarks. However,
this feature is very limited, inasmuch as it only allows the image to occupy
the full size of the reverse side of the card. In this article, we will see
how to create watermark images of any size and to display them on the front of
the card. This also allows colour to be used in the watermark, without paying a
surcharge.
Using Images as Watermarks
A
watermark is essentially a faded image that is displayed behind the text of the
card. VistaPrint displays images behind overlayed text automatically so that
criteria is already fulfilled. The first step, then, in creating a watermark is to
take your existing image and produce a faded version of it, so we need to begin
with loading the image into a graphics program. In all cases like this, you should always start off with as high a resolution version of the image as you have available, and then re-scale at the end of the procedure.
A
high quality graphics program, such as Photoshop, will allow you to fade the
entire image relatively easily by converting the image into a mask and increasing
the brightness, while leaving the background as it is. Any anti-aliasing
feature should be turned on. Simpler images, with a small number of colours,
can be handled with Paint. For the purpose of illustration, we will use a black
and white image, in Paint.
 First, load the image into Paint. Paint doesn't handle high colour images very
well, so we will only deal with a black and white version of the image. To do
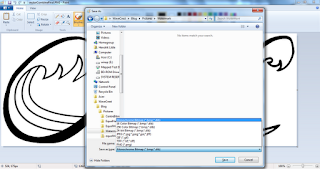
this, save the image as black and white, as shown. Paint may display several message boxes, telling you that you are about to lose colour depth or transparency. Click 'Yes' to all these options.
Next, re-save the picture as a 256 colour bitmap. You need to do this in order to restore a full palette of colours to the image. Ideally, you should save each
version of the image with a different name so that if you make any mistakes,
you can return to a previous version.
 Once
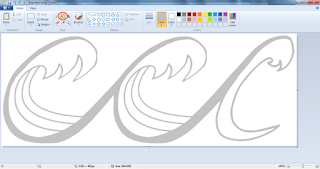
you have a black and white version of your image, you can re-fill it with a
lighter colour. In this example, we will use the standard shade of light grey
but you may want to use a different colour or a lighter shade. A wider range of colours than that depicted is available from Paint but selecting them is a somewhat complex procedure and is beyond the scope of this article.
Now
that you have a faded version of your image you should save it in a standard
image format such as PNG or JPG. You can then upload it to the VistaPrint
editor and resize and position it as normal.
Next
time, in the last of our articles on this topic, we'll be talking about combining watermarks and other images, in order to save money on VistaPrint
surcharges.


No comments:
Post a Comment