For a free online utility, the Vistaprint business card design editor is quite a useful and effective tool. However there are several features, common in other automated design environments, which it lacks. Over the next few weeks, I will be demonstrating how to simulate some of these missing abilities. While the techniques that I show won't be as simple to use as those in a more advanced editor, they will allow you to create your designs more precisely and easily than just doing them by eye. This will lead to a more professional look for your cards and may gain you extra business or possibly just save you some money!
Standardising the Width of Objects
Given that the Vistaprint card designer has the ability to automatically align objects to the top, left, right or bottom –most out of a group, I find it somewhat surprising that it lacks this feature. Nevertheless, here is how to go about simulating it:
Nb., this technique can be used by initially aligning objects to either the leftmost or rightmost border of the card and using either the borders of the object or it's sizing boxes but in this example I will use the right-hand border of the card and the borders of the boxes.
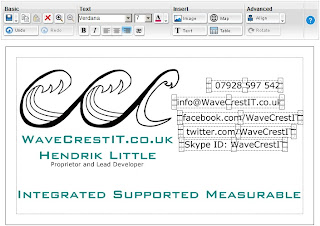
 First, select all the objects you wish to have the same width (*). These can be text or image objects, in any combination. (However, I would suggest that it makes more sense to standardise the width of text objects to that of images, rather than the other way around.) Then, move all the objects so that the borders of the right-hand sizing boxes of the object furthest to the right exactly aligns with the right-hand border of the card (either the external border or the border of the printable area), as shown.
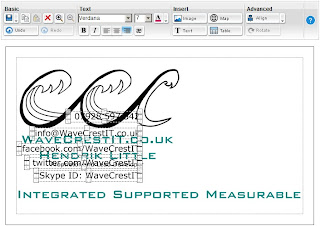
Then move all of the objects so that the borders of the left-hand sizing boxes, of the control you wish to standardise the width to, are precisely aligned with the left-hand border of the card.
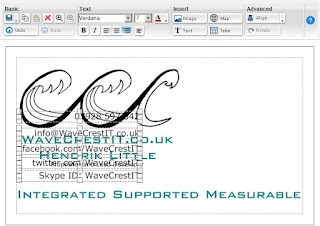
 You will then need to individually adjust the width of each object by selecting it's right-hand width sizing box and moving it so that its left-hand border exactly aligns with the left-hand border of the card. You will find that clicking on the sizing box de-selects all the other objects. Do this for each of the objects.
 Voilà! Your objects now have all the same width and can be selected and moved to a more convenient location.
Next time we'll discuss how to evenly distribute the vertical spacing between the objects.
[ (*) Edit 24/08/2012: I should probably say that to select multiple objects you hold down Shift as you click on them. ]
[Edit 30/03/2013]
You can now download the Standardising the Width of Objects article as a printable PDF file.


No comments:
Post a Comment